Cleaning mould can be straightforward with the right approach and materials. Here’s a step-by-step guide to help you effectively remove mould from various surfaces in your home.
Understanding Mould Growth in Your Home
Before diving into cleaning techniques, it’s important to understand why mould thrives in humid environments. With coastal climates and seasonal changes, homes are particularly susceptible to mould growth in areas like bathrooms, laundries, and poorly ventilated spaces. Recognizing early signs of mould can save you time and prevent extensive damage that might affect your living environment and property value.
Essential Supplies for the Task
- White vinegar
- Baking soda
- Spray bottle
- Scrub brush or sponge
- Microfiber cloth
- Rubber gloves
- Mask (optional)
- Additional supplies for tough jobs:
- Hydrogen peroxide (3% solution)
- Tea tree oil
- Borax
- Old toothbrush for detailed work
- Drop cloths to protect surrounding areas

Step-by-Step Instructions
Step 1: Prepare the Area
- Ensure Ventilation: Open windows and doors for proper airflow to reduce inhalation of mould spores.
- Protect Yourself: Wear rubber gloves and a mask if you are sensitive to mould.
- Protect Surroundings: Lay down drop cloths or plastic sheeting to protect nearby surfaces and furniture.
Step 2: Identify the Affected Areas
- Check Common Spots: Look for mould in bathrooms, kitchens, basements, and areas with high humidity or leaks.
- Look for Hidden Mould: Check behind toilets, under sinks, around window sills, and in corners where air circulation is poor.
For comprehensive guidance on identifying and safely removing ceiling mould before moving out, check out our step-by-step guide to safe ceiling mould removal.
Step 3: Use Vinegar for Cleaning
- Apply Vinegar: Pour white vinegar into a spray bottle. Spray it directly onto the mouldy surface.
- Let it Sit: Allow the vinegar to sit for at least 30 minutes. Vinegar is effective in killing most types of mould.
- For Stubborn Mould: Create a stronger solution by mixing equal parts vinegar and water, or use undiluted vinegar for severe cases.
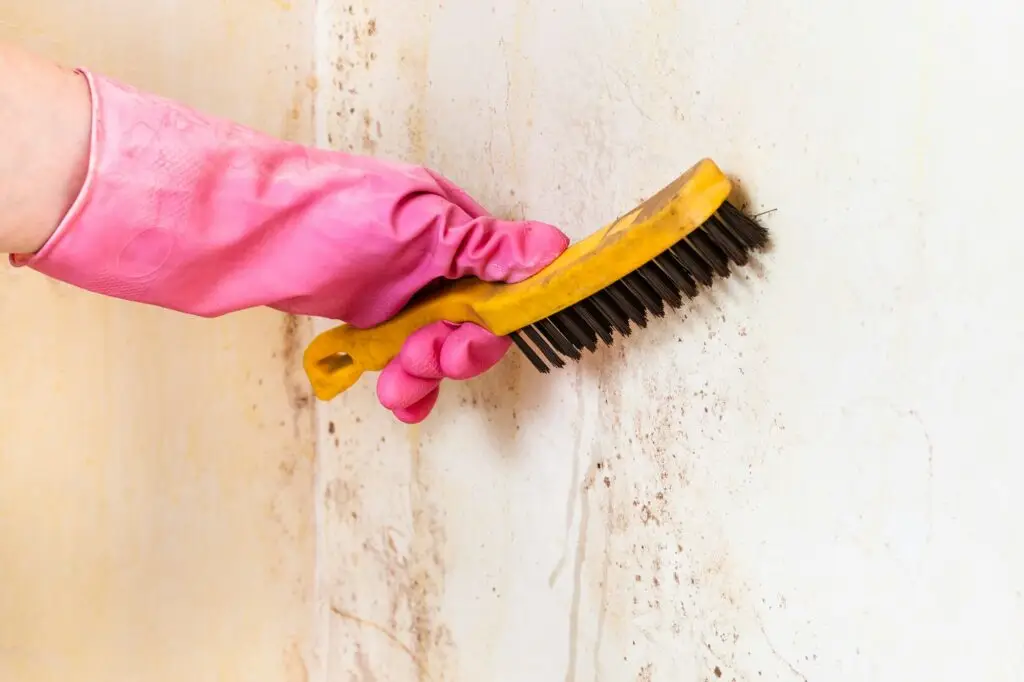
Step 4: Scrub the Surface
- Scrub: Use a scrub brush or sponge to scrub the area thoroughly. For stubborn mould, apply more vinegar and let it sit longer.
- Use Appropriate Tools: For grout lines, use an old toothbrush. For delicate surfaces, use a soft cloth to avoid damage.
Step 5: Baking Soda Treatment (Optional)
- Make a Paste: Mix 1/2 cup of baking soda with a few tablespoons of water to create a paste.
- Apply the Paste: Apply the baking soda paste to the mouldy area and scrub again. Baking soda helps remove stains and absorb moisture.
- Let it Work: Allow the paste to sit for 10-15 minutes before scrubbing for maximum effectiveness.
Step 6: Rinse and Dry
- Wipe Clean: Use a damp cloth to wipe away the vinegar and mould residue.
- Dry the Area: Ensure the surface is completely dry to prevent mould from returning.
- Final Inspection: Check that all visible mould has been removed and no cleaning residue remains.
Step 7: Prevention
- Maintain Low Humidity: Use dehumidifiers or fans in damp areas to keep humidity levels low.
- Regular Cleaning: Regularly clean areas prone to mould to prevent regrowth.
- Fix Leaks Immediately: Address any water leaks or moisture issues promptly.
- Improve Ventilation: Ensure adequate airflow in all areas of your home, especially bathrooms and laundries.
Advanced Mould Removal Techniques
Natural Alternatives for Eco-Conscious Cleaning
For those preferring natural, non-toxic solutions, explore our guide on natural ways to get rid of mold with non-toxic DIY removal methods. These methods are particularly beneficial for families with children, pets, or individuals with chemical sensitivities.
Tea Tree Oil Solution
- Mix 1 teaspoon of tea tree oil with 1 cup of water
- Spray onto affected areas and don’t rinse
- Tea tree oil has natural antifungal properties and leaves a pleasant scent
Hydrogen Peroxide Method
- Use 3% hydrogen peroxide in a spray bottle
- Apply directly to mould and let sit for 10 minutes
- Scrub and wipe clean with a damp cloth
- Caution: Test on a small, inconspicuous area first as hydrogen peroxide can bleach some materials
Tips for Specific Areas
For Walls
- Use a mixture of vinegar and water (1:1 ratio) for wall cleaning.
- For Painted Walls: Be gentle to avoid removing paint. Consider using a softer brush or cloth.
- For Wallpaper: Test cleaning solutions on a hidden area first, as some wallpapers may be damaged by acidic solutions.
For Grout
- Apply vinegar directly to the grout lines, let it sit, then scrub with a toothbrush.
- For Stubborn Grout Mould: Make a paste with baking soda and water, apply, then spray with vinegar for a fizzing action that helps lift mould.
- Prevention Tip: Seal grout lines annually to prevent moisture penetration.
For Fabrics
- For mould on fabrics, wash items in hot water with detergent and add a cup of vinegar.
- For Delicate Fabrics: Consider professional cleaning for expensive or delicate items.
- Sun Drying: Whenever possible, dry items in direct sunlight, which naturally kills mould spores.
For Hard Surfaces (Tiles, Glass, Metal)
- White vinegar is highly effective on non-porous surfaces
- Follow up with a disinfectant if the mould was extensive
- Dry thoroughly to prevent immediate regrowth
When to Call Professionals
Understanding the Mould Remediation Process
While DIY methods work well for small areas, extensive mould problems require professional intervention. Our comprehensive guide on understanding the mold remediation process for homeowners explains when professional help is necessary and what to expect during the process.
Consider professional help when:
- Mould covers an area larger than 1 square meter
- Mould returns repeatedly despite cleaning efforts
- You experience health symptoms related to mould exposure
- Mould is present in HVAC systems or behind walls
- You’re dealing with black mould (Stachybotrys)
Complete Mould Removal Process Overview
For a thorough understanding of the entire mould removal process from identification to prevention, refer to your guide to the mold removal process. This comprehensive resource covers everything from initial assessment to long-term prevention strategies.
Establishing a Regular Mildew Clean Routine
Prevention is always better than cure when it comes to mould. Develop a consistent cleaning routine with our expert tips for your mildew clean routine. Regular maintenance cleaning can prevent small mould issues from becoming major problems.
Weekly Prevention Tasks:
- Wipe down shower walls after each use
- Check under sinks for leaks
- Clean bathroom exhaust fans
- Vacuum and mop areas prone to moisture
Monthly Prevention Tasks:
- Deep clean bathroom grout
- Check and clean window sills
- Inspect areas around plumbing fixtures
- Test humidity levels throughout the home
Special Considerations for Renters
Property Protection Through Proper Mould Management
For tenants, addressing mould issues promptly and thoroughly is crucial for property protection. Property managers expect rental properties to be returned in good condition, and visible mould can result in security deposit deductions or professional cleaning charges.
Important for End-of-Lease:
- Document existing mould issues when moving in
- Address mould problems immediately to prevent spreading
- Keep records of cleaning efforts and products used
- Consider professional cleaning if mould is extensive
Climate Challenges
Different climates create unique challenges:
- High Humidity Areas: Indoor humidity rises during cooler months or rainy seasons
- Coastal Areas: Salt air can accelerate certain types of surface deterioration
- Seasonal Changes: Create ideal conditions for mould growth during certain times of year
Health and Safety Considerations
Protecting Yourself During Cleaning
- Always wear protective equipment when dealing with mould
- Ensure adequate ventilation during and after cleaning
- Don’t mix different cleaning products, as this can create dangerous fumes
- If you have respiratory conditions, consider having someone else do the cleaning or hire professionals
Recognizing When Mould is Dangerous
Seek professional help immediately if you notice:
- Large areas of black or dark mould
- Mould that returns within days of cleaning
- Strong, persistent musty odors
- Health symptoms that worsen when at home
Choosing the Right Cleaning Method
Different types of mould and surfaces require different approaches:
| Surface Type | Best Method | Additional Notes |
|---|---|---|
| Painted Walls | Vinegar solution | Test first to avoid paint damage |
| Tile & Grout | Baking soda paste + vinegar | Use old toothbrush for grout lines |
| Glass | Vinegar or hydrogen peroxide | Streak-free cleaning |
| Fabric | Hot water wash + vinegar | Professional cleaning for delicates |
| Wood | Light vinegar solution | Dry immediately to prevent damage |
| Metal | Vinegar or hydrogen peroxide | Dry thoroughly to prevent rust |
Cost-Effective DIY vs Professional Services
When DIY Makes Sense:
- Small affected areas (less than 1 square meter)
- Surface mould on non-porous materials
- Recent mould growth from temporary moisture issues
- You have time and appropriate materials
When Professional Service is Worth the Investment:
- Extensive mould coverage
- Mould in HVAC systems or behind walls
- Repeated mould problems despite cleaning efforts
- Health concerns or immunocompromised household members
- Time constraints or physical limitations
Long-Term Mould Prevention Strategies
Moisture Control
- Use exhaust fans in bathrooms and kitchens
- Fix leaks immediately
- Maintain proper ventilation throughout the home
- Consider a whole-house dehumidifier in humid climates
Regular Maintenance
- Clean and maintain HVAC systems
- Inspect and clean gutters regularly
- Ensure proper drainage around your home’s foundation
- Check and maintain caulking around windows and doors
Environmental Monitoring
- Use humidity meters to monitor indoor conditions
- Keep indoor humidity below 60%
- Address condensation issues on windows
- Monitor areas prone to moisture accumulation
By following these steps, you can effectively clean mould and reduce the chances of it returning! Remember, consistent prevention and early intervention are key to maintaining a healthy, mould-free environment in your home.

Conclusion
Effective mould removal doesn’t have to be complicated or expensive. With the right knowledge, tools, and techniques outlined in this guide, you can tackle most mould problems safely and successfully. The key to long-term success lies in understanding that mould prevention is just as important as removal—maintaining proper ventilation, controlling humidity levels, and addressing moisture issues promptly will save you time and effort in the long run.
Remember that while DIY methods work excellently for small to moderate mould issues, don’t hesitate to seek professional help for extensive problems or when health concerns arise. Your safety and the integrity of your home should always be the top priority.
Whether you’re dealing with a minor bathroom mould issue or preparing your rental property for inspection, the techniques and prevention strategies in this guide will help you maintain a clean, healthy living environment for you and your family.
Need professional help with extensive mould problems or end-of-lease cleaning? Contact professional cleaning services in your area for expert assistance with comprehensive cleaning and mould remediation services.
For more cleaning tips, visit our blog page.